In this post i will create a form and and upload image, We will do this step by step, Please follow the below steps..
- Install Laravel App
- Put Database Details
- Install Spatie library in Laravel
- Set Up Migration and Model
- Build Controller File
- Create New Routes
- Set Up Blade View Files
- Add App URL
- Run Laravel App
Step 1. Install Laravel App
This step we will install Laravel using composer
$ composer create-project laravel/laravel SpatieProject
Step 2. Put Database Details
Open the .env file and update your database details.
DB_CONNECTION=mysql
DB_HOST=127.0.0.1
DB_PORT=3306
DB_DATABASE=YOUR_DB_NAME
DB_USERNAME=YOUR_DB_USER_NAME
DB_PASSWORD=YOUR_PASSWORD
Step 3. Install Spatie library in Laravel
I will install this by using composer, Check the below command.
$ composer require "spatie/laravel-medialibrary:^9.6.0"
and
$ php artisan vendor:publish --provider="Spatie\MediaLibrary\MediaLibraryServiceProvider" --tag="migrations"
Now execute a command to run migrations.
$ php artisan migrate
Step 4. Set Up Migration and Model
Already Laravel Provides us User Model so we no need to create model file , If you wish to create model with Other Name please use below cammand.
$ php artisan make:model YOUR_MODEL_NAME -m
In your Model file import the below
use Spatie\MediaLibrary\InteractsWithMedia;use Spatie\MediaLibrary\HasMedia;
<?php

namespace App\Models;

use Illuminate\Contracts\Auth\MustVerifyEmail;
use Illuminate\Database\Eloquent\Factories\HasFactory;
use Illuminate\Foundation\Auth\User as Authenticatable;
use Illuminate\Notifications\Notifiable;
use Laravel\Sanctum\HasApiTokens;
use Spatie\MediaLibrary\InteractsWithMedia;
use Spatie\MediaLibrary\HasMedia;

class User extends Authenticatable implements HasMedia
{ use HasApiTokens, HasFactory, Notifiable,InteractsWithMedia;
....
....
....
}
?>
Step 5. Build Controller File
Next, go to terminal and execute command to generate a controller. Here my Controller name is Register, You can put your own choice name.
$ php artisan make:controller Register
Check the below code of Resgister.php
<?php

namespace App\Http\Controllers;

use Illuminate\Http\Request;
use App\Models\User;

class Register extends Controller
{
    public function index(){
        return view('create_user');
    }

    public function store(Request $request){
        $input = $request->all();
        $user = User::create($input);
        if($request->hasFile('avatar') && $request->file('avatar')->isValid()){
            $user->addMediaFromRequest('avatar')->toMediaCollection('avatar');
        }
        return redirect()->route('user-create');

    }

    public function listuser(){
        $users = User::latest()->get();
        return view('list_user', compact('users'));
    }
}
Step 6. Create New Routes
Go inside the routes/web.php and define the three routes with Get and Post methods altogether.
<?php

use Illuminate\Support\Facades\Route;
use App\Http\Controllers\Register;

/*
|--------------------------------------------------------------------------
| Web Routes
|--------------------------------------------------------------------------
|
| Here is where you can register web routes for your application. These
| routes are loaded by the RouteServiceProvider within a group which
| contains the "web" middleware group. Now create something great!
|
*/

Route::get('user-list',[Register::class,'listuser'])->name('user-list');
Route::get('user-create',[Register::class,'index'])->name('user-create');
Route::post('user-save',[Register::class,'store'])->name('user-save');
Step 7. Set Up Blade View Files
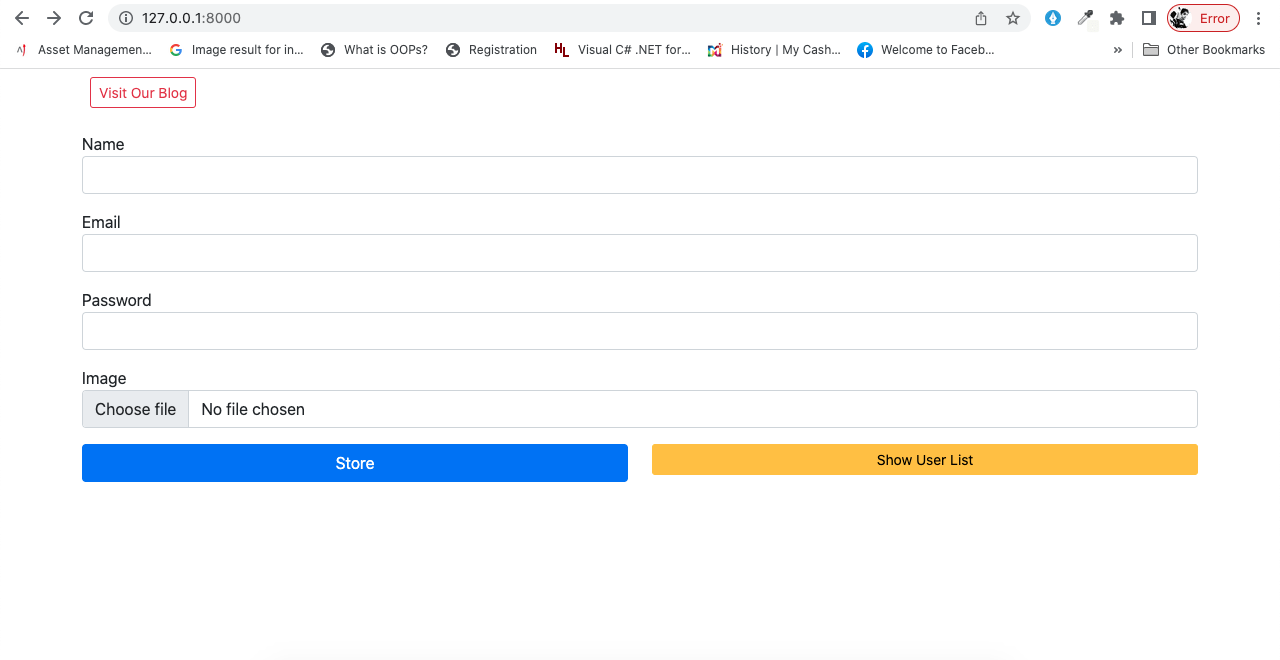
I will create two view these files, we will build a form for user registration and create a file to show clients data after fetching from the database.
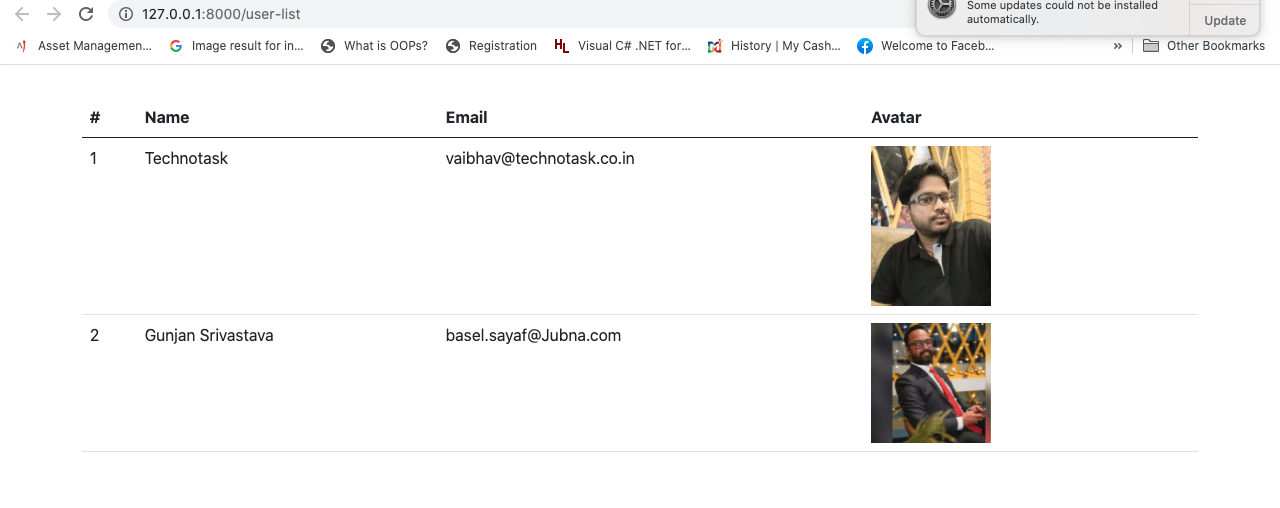
we will create two view file . One for Create user and Second is for List Users.
create_user.blade.php
<!DOCTYPE html>
<html>
<head>
    <meta charset="utf-8">
    <meta name="viewport" content="width=device-width, initial-scale=1">
    <title>Add Spatie Medialibrary in Laravel</title>
    <link href="https://cdn.jsdelivr.net/npm/[email protected]/dist/css/bootstrap.min.css" rel="stylesheet">
</head>
<body>
    <div class="container">
        <div class="d-flex p-2 bd-highlight mb-3">
            <a href="https://readytocode.net/" target="_BLANK" class="btn btn-outline-danger btn-sm" style="float: right">Visit Our Blog</a>
        </div>
        <div>
            <form action="{{ route('user-save') }}" enctype="multipart/form-data" method="post">
                @csrf
                <div class="mb-3">
                    <label>Name</label>
                    <input type="text" name="name" class="form-control">
                </div>
                <div class="mb-3">
                    <label>Email</label>
                    <input type="email" name="email" class="form-control">
                </div>
                <div class="mb-3">
                    <label>Password</label>
                    <input type="password" name="password" class="form-control">
                </div>
                <div class="mb-3">
                    <label>Image</label>
                    <input type="file" name="avatar" class="form-control">
                </div>
                <div class="row">
                <div class="col-sm-6">
                    <div class="d-grid">
                        <button class="btn btn-primary">Store</button>
                    </div>
                </div>
                <div class="col-sm-6">
                    <div class="d-grid">
                    <a href="{{ route('user-list') }}" target="_BLANK" class="btn btn-warning btn-sm" style="float: right">Show User List</a>
                    </div>
                </div>
                </div>

            </form>
        </div>
    </div>
</body>
</html>
list_user.blade.php
<!DOCTYPE html>
<html>
<head>
    <meta charset="utf-8">
    <meta name="viewport" content="width=device-width, initial-scale=1">
    <title>Integrate Spatie Medialibrary in Laravel</title>
    <link href="https://cdn.jsdelivr.net/npm/[email protected]/dist/css/bootstrap.min.css" rel="stylesheet">
</head>
<body>
    <div class="container">
        <div class="d-flex p-2 bd-highlight mb-3">
        </div>
        <table class="table">
            <thead>
                <tr>
                    <th>#</th>
                    <th>Name</th>
                    <th>Email</th>
                    <th width="30%">Avatar</th>
                </tr>
            </thead>
            <tbody>
                @foreach($users as $key=>$item)
                <tr>
                    <td>{{ ++$key }}</td>
                    <td>{{ $item->name }}</td>
                    <td>{{ $item->email }}</td>
                    <td><img src="{{$item->getFirstMediaUrl('avatar', 'thumb')}}" / width="120px"></td>
                </tr>
                @endforeach
            </tbody>
        </table>
    </div>
</body>
</html>
Step 8. Add App URL
This is required because default URL is in .env file.
in my case.
APP_URL=http://127.0.0.1:8000
Step 9. Run Laravel App
We are using media file for that we must have to user
$ php artisan storage:link
and at last run the command
$ php artisan serve
Output: